
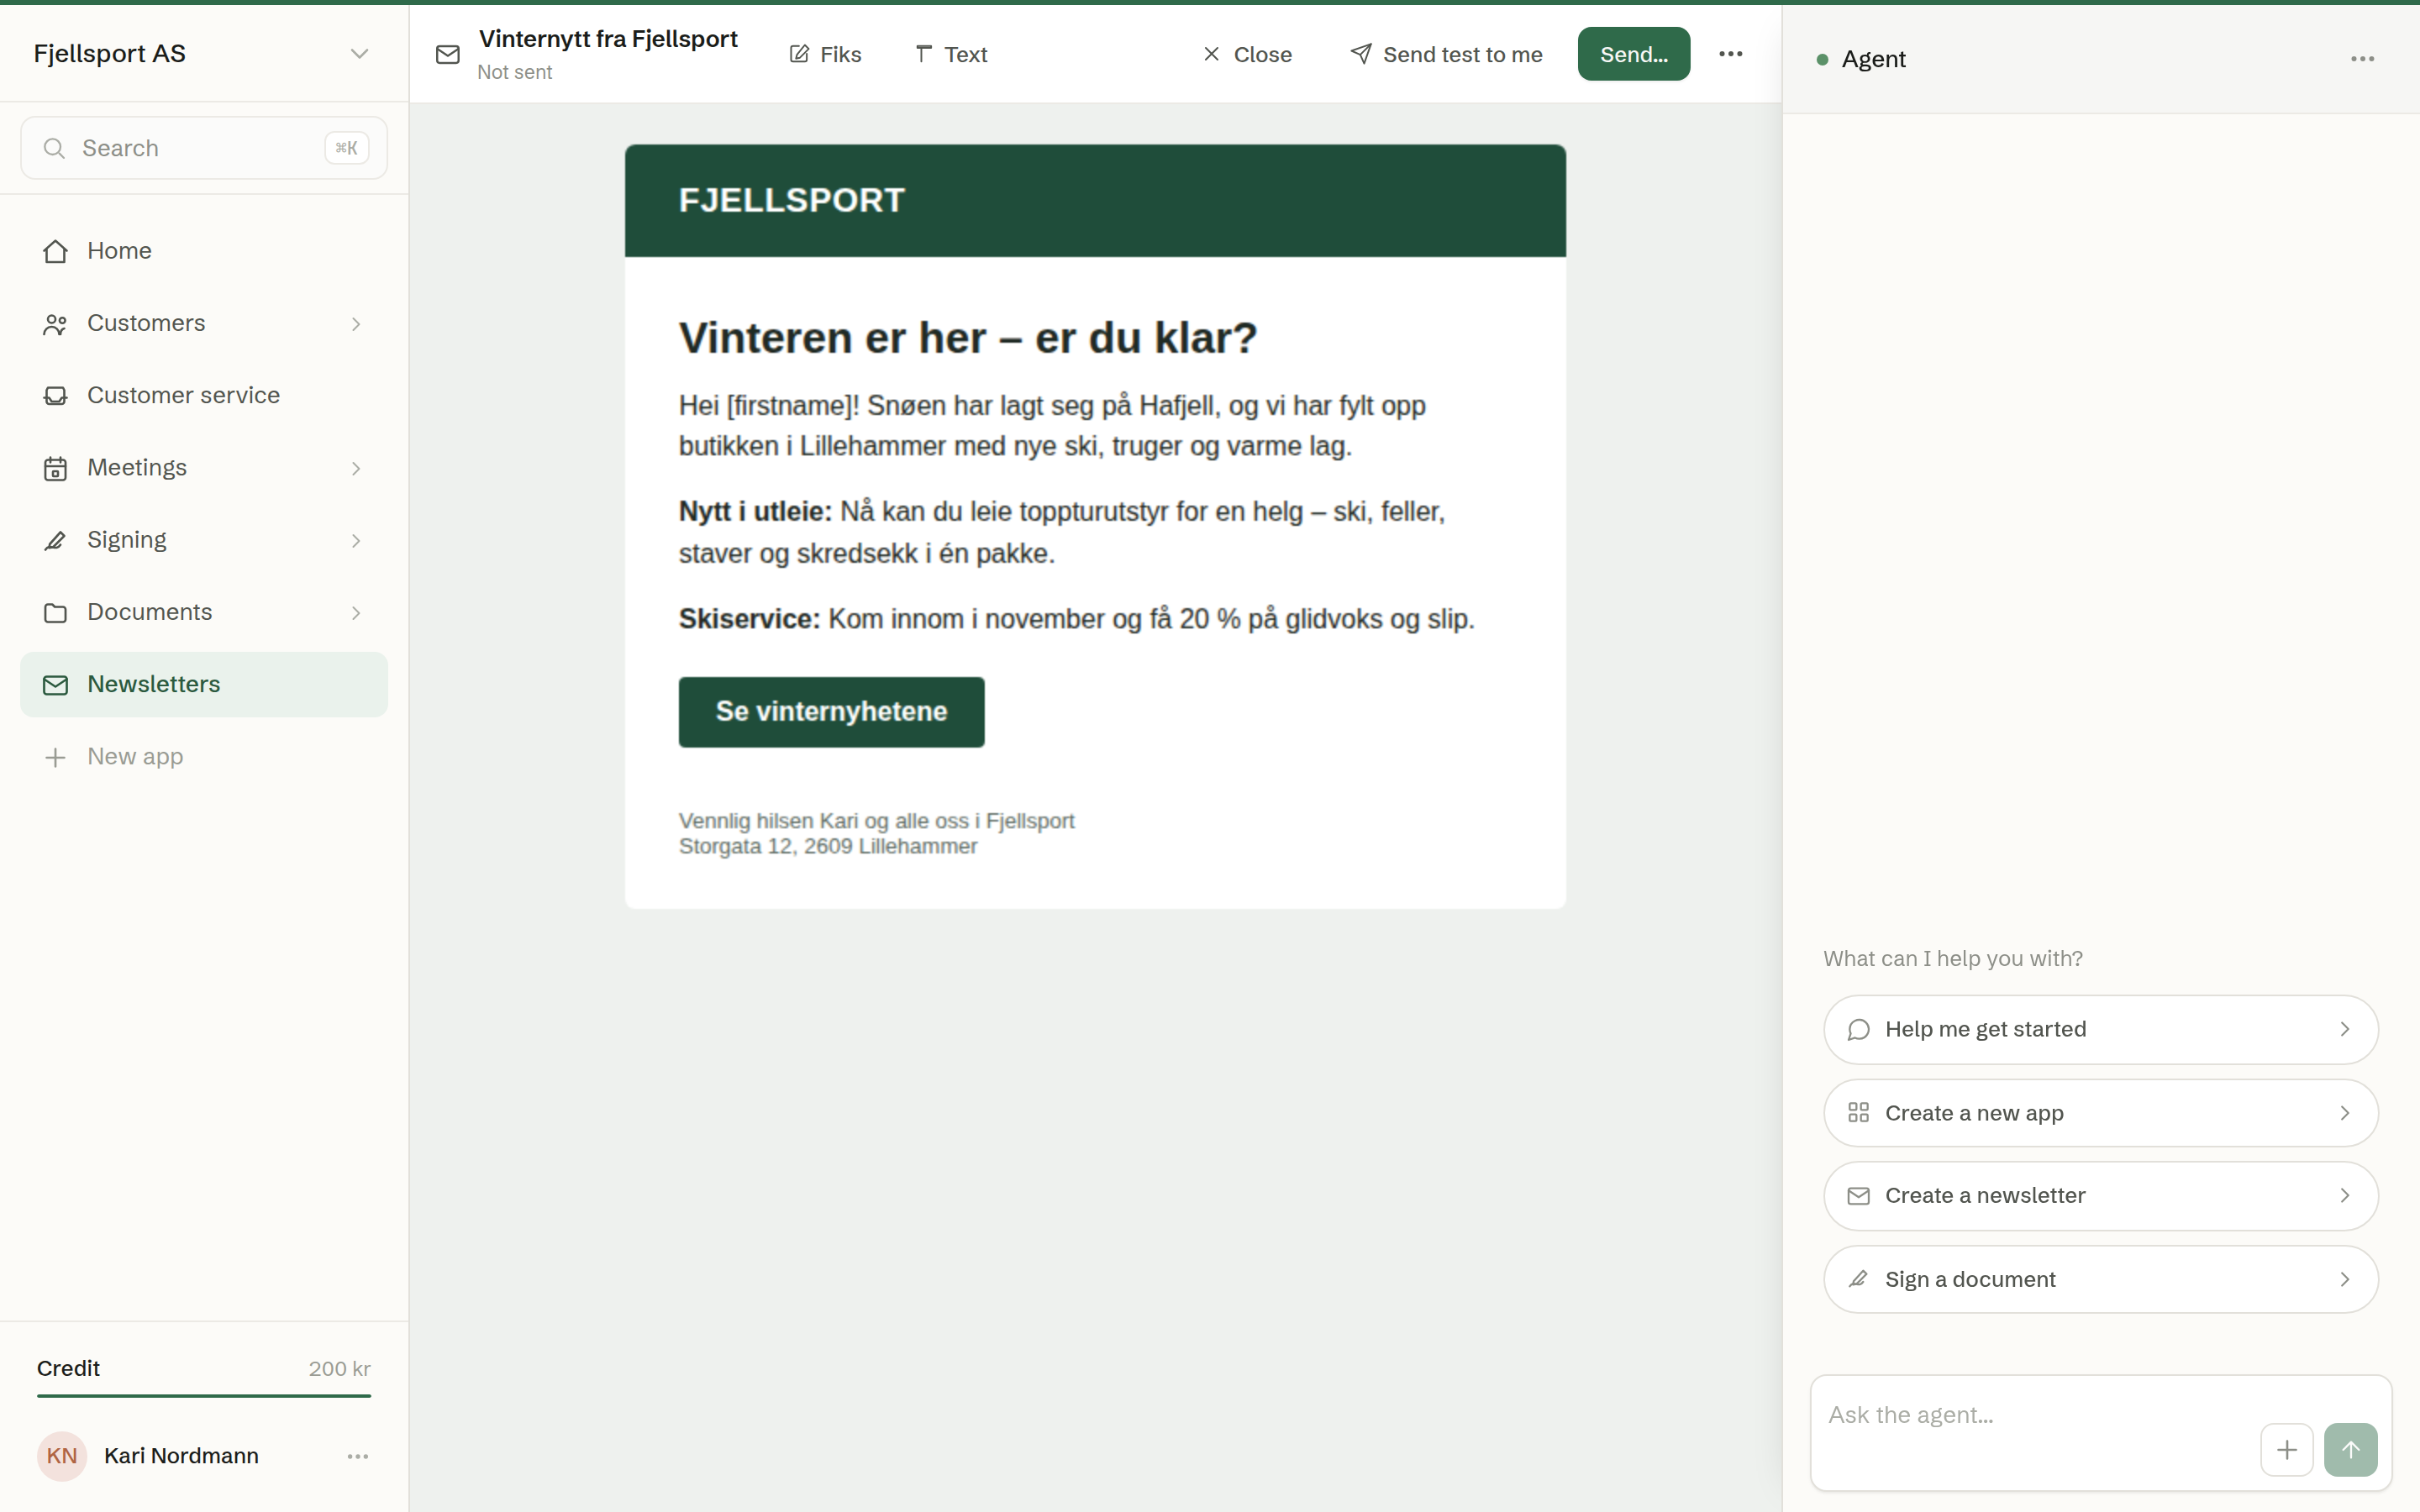
Open a newsletter from the list to edit it. The newsletter fills the middle of the screen, the agent's chat is on the right, and the bar at the top holds the newsletter's name and its buttons.
Ask the agent
Write what you want changed in the chat: «make the heading shorter», «add a section about ski rental with a picture», «use our green as the background of the button». The agent changes the newsletter and you see the result as soon as it is done.
The bar at the top
- The name — click it to rename the newsletter. Under it is Not sent until the newsletter has gone out.
- Fiks — click an element in the newsletter and write a note about what should change there; the agent gets the note with the element it is about.
- Text — edit the text directly on the page. Click a piece of text, type, and the change is saved by itself.
- Close — back to where you came from.
- Send test to me — sends the newsletter to your own email address. See Preview and test sends.
- Send… — opens the send dialog. See Sending a newsletter.
Merge fields
Write [firstname], [lastname], [name], [company] or [email] anywhere in the text, and each recipient gets their own name, company or address in its place. The names come from the contacts in Customers. When a contact has no name, the field disappears cleanly with the space and punctuation around it: «Hei [firstname]!» becomes «Hei!».
After the first send
Once a newsletter has been sent, the version in the inboxes stays as it was. If you change it afterwards, the bar says Unsaved changes — the sent version is unchanged, with Save and Discard. Send… then reads Send again….