
Under Add a connection, first choose the kind: MCP (a tool server for the agent) or API (fetch or send data to a service). The fields change with your choice. Admin
An MCP server
- Name — what the connection is called in Brigg, for example «Shopify».
- Address (URL) — the MCP address the service gives you.
- Authentication — how Brigg signs in:
- OAuth (recommended) — the default. The button becomes Authorise; you sign in with the service and come back to Brigg.
- API key — fill in Header name (usually «Authorization») and Key.
- None — for an open server.
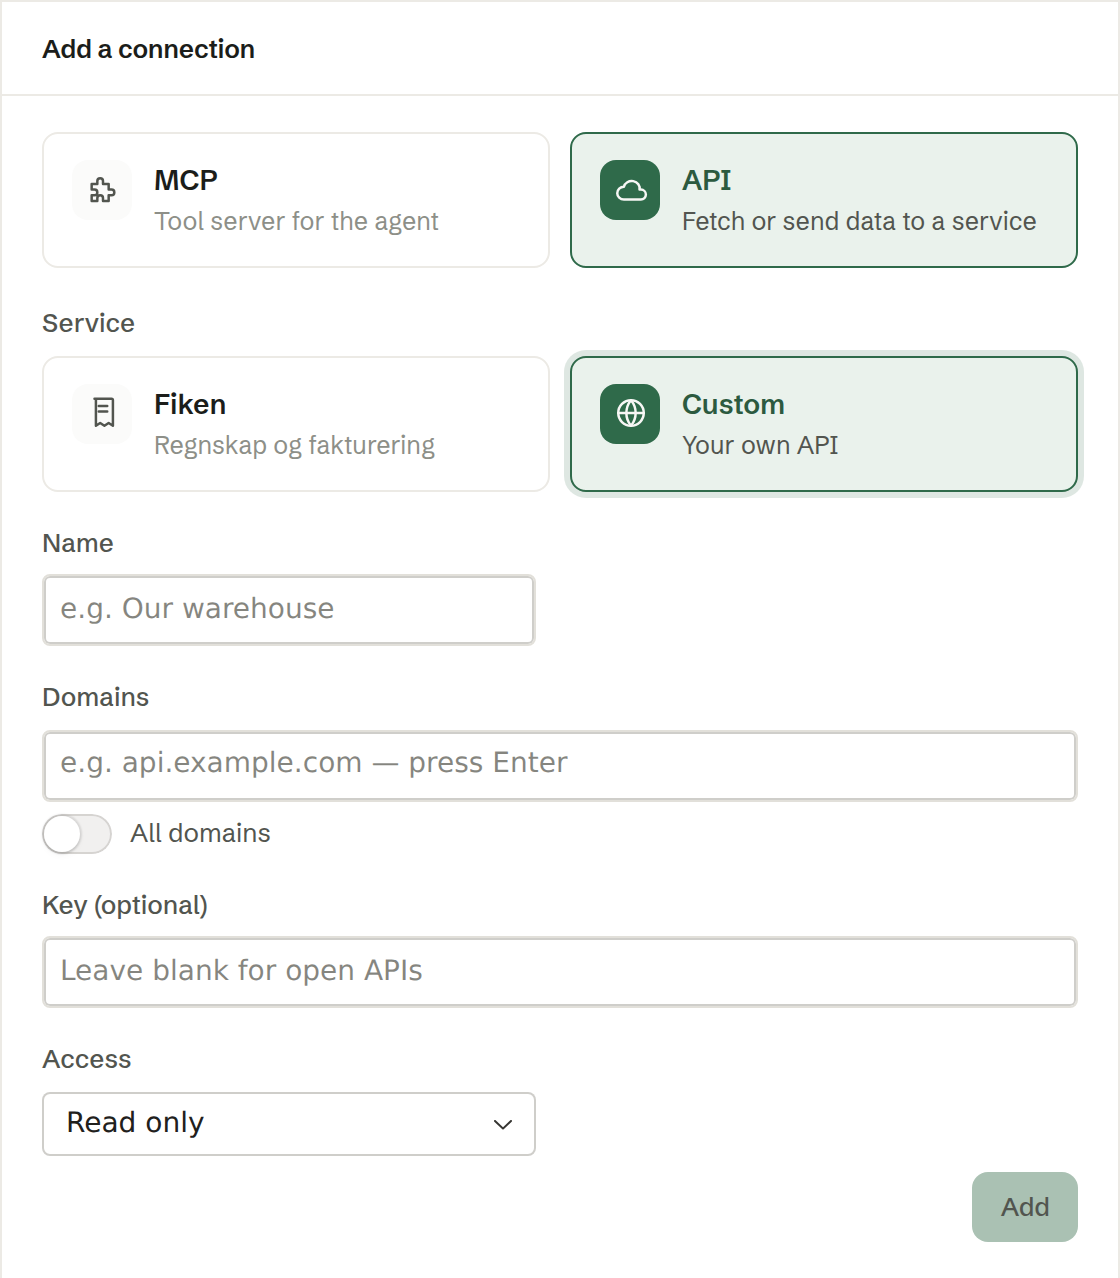
An API
Under Service, pick a ready-made service or Custom:
- A ready-made service, such as Fiken — paste its key and you are done; Brigg already knows its address.
- Custom — your own API. Fill in:
- Name — what it is called in Brigg, for example «Lagersystem».
- Domains — the addresses the agent may call, such as
api.example.com. Press Enter after each one. All domains lets the agent call any address with this connection. - Key (optional) — leave it blank for an open API. With a key, fill in Header name and Header format — how the key is sent, by default «Bearer» followed by the key.
For both, Access decides what the agent may do: Read only (the default) only fetches data; Full access may also change data in the other system.
Saving
Press Add. The connection appears in the list and the agent can use it straight away.